Grouping Assets by Location
Adding a Location
Locations associate an Asset with a ‘home’ that can help when governing sharing policies with OBAC and ABAC. Locations do not need pinpoint precision and can be named by site, building, or other logical grouping.
It may be useful to indicate an Asset’s origin. For example, if tracking traveling consultant’s laptops, you may wish to associate them with a ‘home’ office.
Caution: It is important to recognize that the location does not necessarily denote the Asset’s current position in space; it simply determines which facility the Asset belongs to. For things that move around, use GIS coordinates on Events instead. See concept docs on locations for more information.
Creating a Location
Note: The Locations UI is not displayed in the side menu until after the first location has been created using the API. After this you can use the UI to create new locations but to update or delete a location you will still need to use the API
Create your location
In the dashboard, select
Locations, thenAdd Location.
Adding a Location The DataTrails YAML runner is executed as a series of steps, each step representing a single operation with an
action.In order to create a location, we use the action
LOCATIONS_CREATE_IF_NOT_EXISTS.--- steps: - step: action: LOCATIONS_CREATE_IF_NOT_EXISTSCreate an empty file, in later steps we will add the correct JSON
{ }Add information about the location you are creating
The following screen will appear:
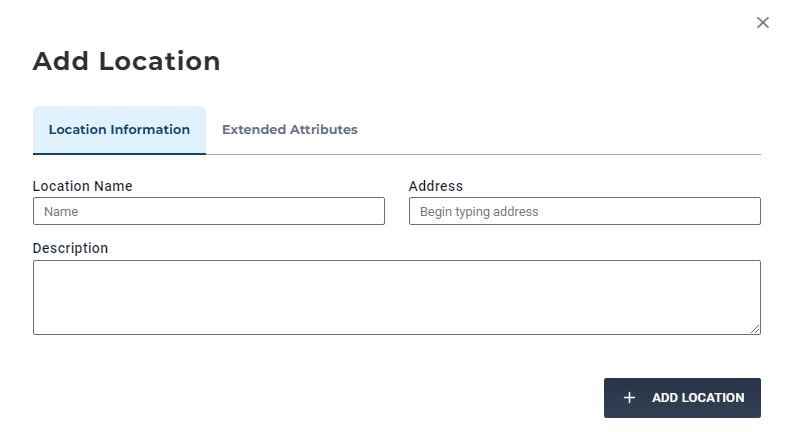
The Location Webform You may add a
descriptionand aselector. Theselectoris the identifying attribute used to check if your location exists before attempting to create it. In this case, we usedisplay_namewhich represents the name of the location.--- steps: - step: action: LOCATIONS_CREATE_IF_NOT_EXISTS description: Create UK factory location. selector: - display_nameYou may add a
display_nameanddescriptionto identify your location.{ "display_name": "UK Factory", "description": "Industrial Warehouse in Bristol Harbor" }Enter the required location name and address, or in the case of YAML and JSON, coordinates
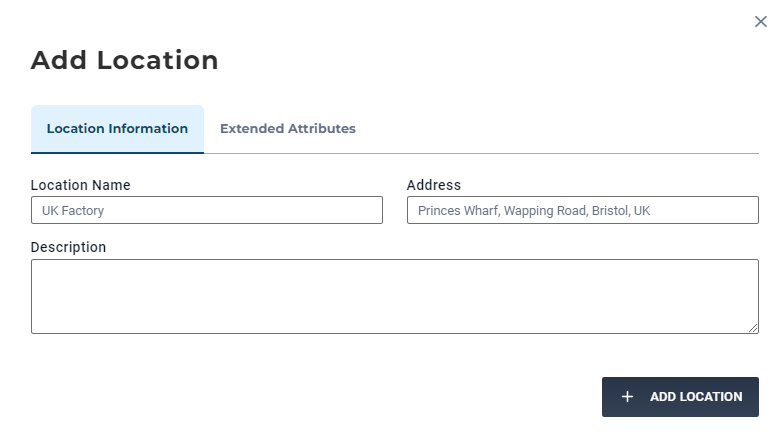
Adding the Location Details Use
latitudeandlongitudeto describe the physical location--- steps: - step: action: LOCATIONS_CREATE_IF_NOT_EXISTS description: Create UK factory location. selector: - display_name display_name: UK Factory description: Industrial Warehouse in Bristol Harbor latitude: 51.4477 longitude: -2.5980Use
latitudeandlongitudeto describe the physical location{ "display_name": "UK Factory", "description": "Industrial Warehouse in Bristol Harbor", "latitude": 51.4477, "longitude": -2.5980 }There is an option to add extended attributes to a location. This is useful to add metadata to a location, i.e. a site contact’s number and email address
Use the
Extended Attributestab.
Adding Extended Attributes to a Location Like Assets and Events, locations may also have extended attributes added as key-value pairs
--- steps: - step: action: LOCATIONS_CREATE_IF_NOT_EXISTS description: Create UK factory location. selector: - display_name display_name: UK Factory description: Factory in Bristol Harbor latitude: 51.4477 longitude: -2.5980 attributes: address: Princes Wharf, Wapping Rd, Bristol BS1 4RN, UK Primary_Contact: Jill Tiller Primary_Mobile_Number: +447700900077Like Assets and Events, locations may also have extended attributes added as key-value pairs
{
   "display_name": "UK Factory",
   "description": "Industrial Warehouse in Bristol Harbor",
   "latitude": 51.4477,
   "longitude": -2.5980,
   "attributes": {
     "address": "Princes Wharf, Wapping Rd, Bristol BS1 4RN, UK",
     "Primary_Contact": "Jill Tiller",
     "Primary_Mobile_Number": "+447700900077"
   }
}
Complete your location
Click
Add Location.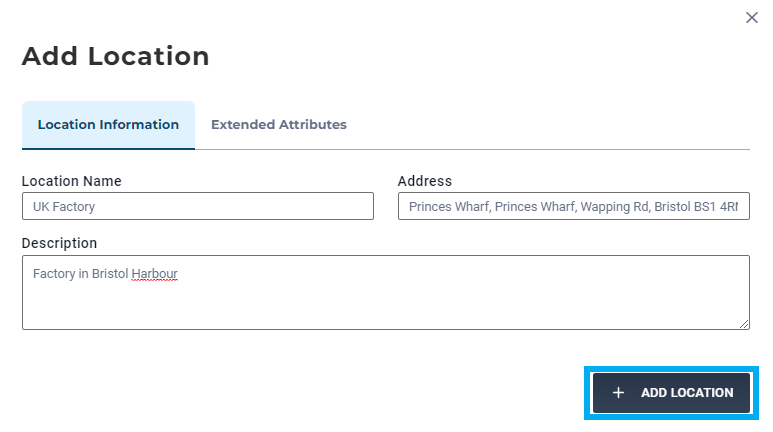
Submitting a Location Use the archivist_runner to run your YAML file!
$ archivist_runner \
      -u https://app.datatrails.ai \
      --client-id <your-client-id> \
      --client-secret <your-client-secret> \
      UK_factory_location.yaml
Use the curl command to run your JSON file! See instructions for creating your
BEARER_TOKEN_FILEhere.curl -v -X POST \ -H "@$HOME/.datatrails/bearer-token.txt" \ -H "Content-type: application/json" \ -d "@/path/to/jsonfile" \ https://app.datatrails.ai/archivist/v2/locationsView your locations
Navigate to
Locationsin the sidebar to see a list of existing locations.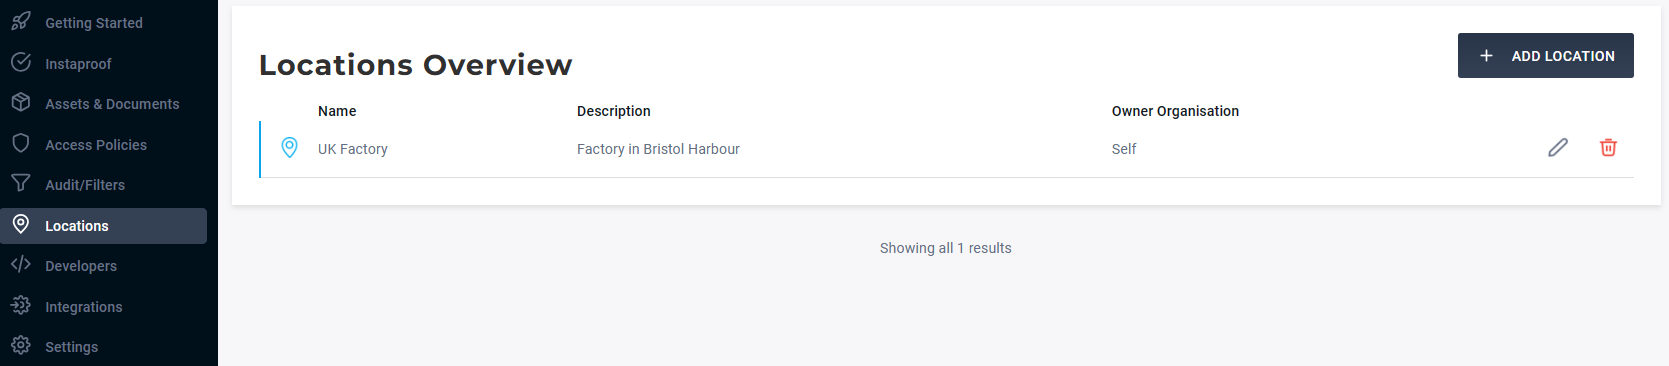
Managing a Location You can view all location data using the
LOCATIONS_LISTaction. Use theprint_responsekeyword to get the full output--- steps: - step: action: LOCATIONS_LIST description: List all locations. print_response: trueUse the Locations API to GET a list of existing locations.
curl -v -X GET \
     -H "@$HOME/.datatrails/bearer-token.txt" \
     https://app.datatrails.ai/archivist/v2/locations
View details of the location you just created
You can inspect details of a single location. Click the desired location row
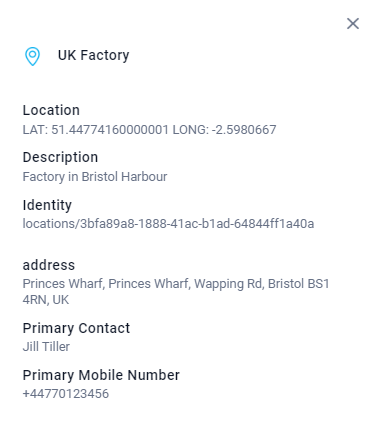
Viewing a Location The
LOCATIONS_LISTaction can be filtered using identifying attributes (attrs) to view the details of a specific location.--- steps: - step: action: LOCATIONS_LIST description: Display Location named UK Factory. print_response: true attrs: arc_display_name: UK FactoryUse the Locations API to GET the specific location by name.
curl -v -X GET \
     -H "@$HOME/.datatrails/bearer-token.txt" \
     "https://app.datatrails.ai/archivist/v2/locations?display_name=UK%20Factory"
Assigning a Location to an Asset
Adding at Asset Creation
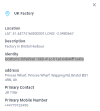
To assign a pre-existing location to an Asset during Asset creation, you need only select it
Choose the desired location from the Location drop-down.
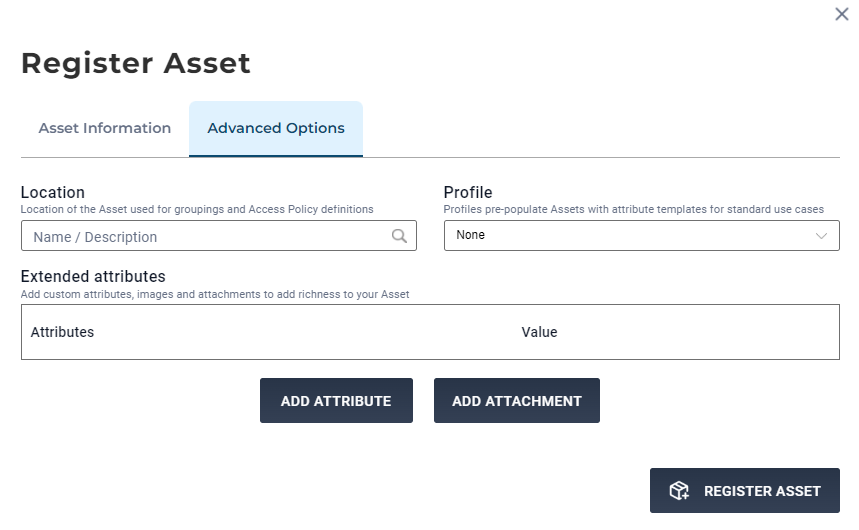
A pre-existing location can be added during Asset creation, using the Location ID as an identifier (e.g. locations/<location-id>).
---
steps:
- step:
action: ASSETS_CREATE_IF_NOT_EXISTS
description: Create an asset with pre-existing Location.
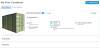
asset_label: My First Container
selector:
- attributes:
- arc_display_name
behaviours:
- RecordEvidence
attributes:
arc_display_name: My First Container
arc_display_type: Shipping Container
arc_home_location_identity: <your-location-id>
confirm: false
The YAML Runner also allows you to create new locations at Asset Creation.
---
steps:
  - step:
      action: ASSETS_CREATE_IF_NOT_EXISTS
      description: Create an asset.
      asset_label: My First Container
    selector:
      - attributes:
        - arc_display_name
    behaviours:
      - RecordEvidence
    attributes:
      arc_display_name: My First Container
      arc_display_type: Shipping Container
    location:
      selector:
        - display_name
      display_name: UK Factory
      description: Container Origin
      latitude: 52.2025
      longitude: 0.1311
      attributes:
        action: LOCATIONS_CREATE_IF_NOT_EXISTS
        location_label: UK Factory
    confirm: false
A pre-existing location can be added during Asset creation, using the Location ID as an identifier (e.g. locations/<location-id>).
{
    "behaviours": ["RecordEvidence"],
    "attributes": {
        "arc_display_name": "My First Container",
        "arc_display_type": "Traffic light with violation camera",
        "arc_home_location_identity": "locations/<location-id>"
    }
}
Adding to a pre-existing Asset
To assign a pre-existing Asset with a new location, you need to identify the Location ID. To do this, view the location details by clicking the location row.
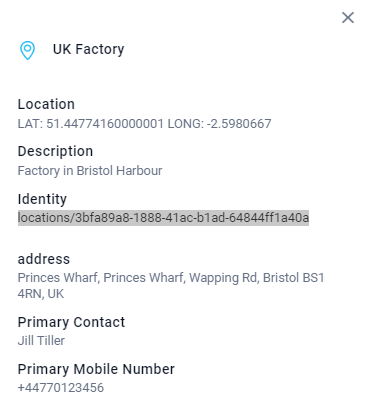
Location Identity Then create an Event for the Asset and specify the identity of the new location as noted in step 1, against the
arc_home_location_identitykey
For more information on creating Events, please visit Creating an Event Against an Asset.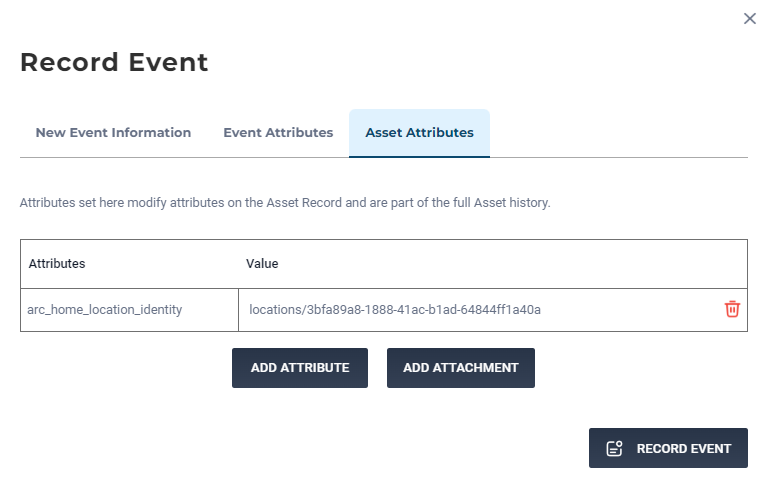
Updating an Existing Asset with a new Location The
EVENTS_CREATEaction must contain at least one key-value pair forevent_attributes.--- steps: - step: action: EVENTS_CREATE description: Add Location to existing Asset. asset_label: assets/<asset-id> operation: Record behaviour: RecordEvidence event_attributes: new_event: Record Asset Location asset_attributes: arc_home_location_identity: locations/<location-id> confirm: false{ "operation": "Record", "behaviour": "RecordEvidence", "asset_attributes": { "arc_home_location_identity": "locations/<location-id>" } }Note - The Event must be recorded against the appropriateassets/<asset-id>when the curl command is executed. See Step 4 here for more details.Note - You need to include the fulllocations/<location-id>reference as using only theUUIDwill not be recognized.In the following screenshot, note the location of our Asset has been updated
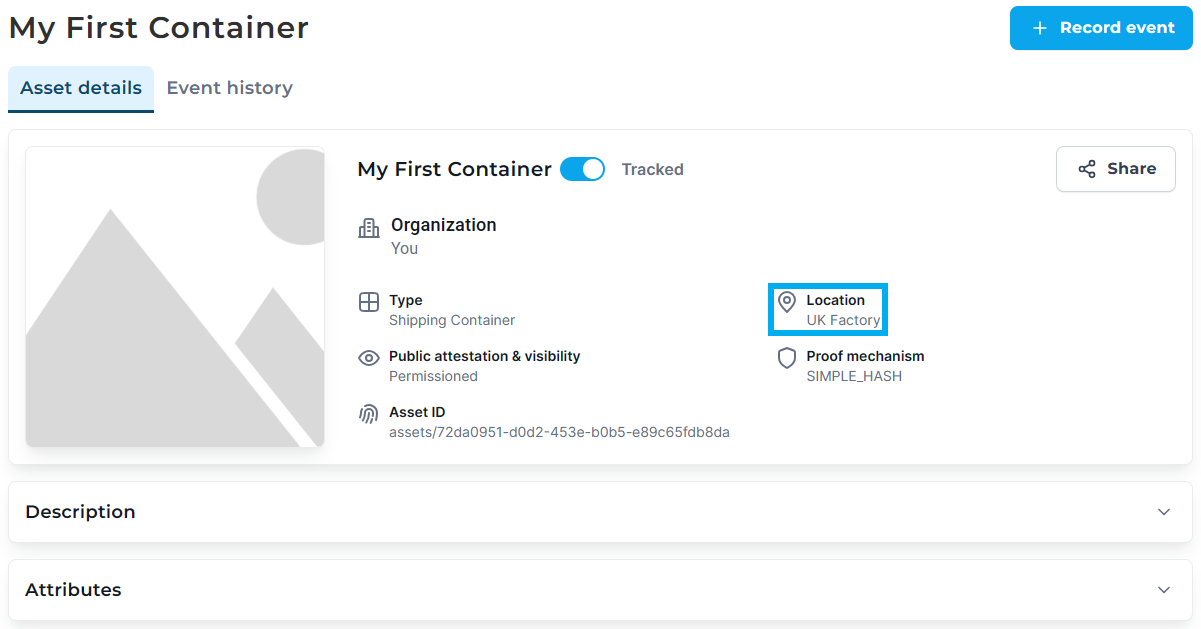
Completed update of Asset Location